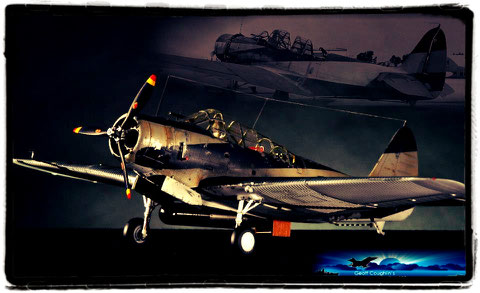
Available now
1/48 TBD Devastator paint mask set "Barclay No.8"

Both the US Army and the US Navy attempted various experiments in camouflaging aircrafts during the late 1930´s and 1940. One of the Navy´s initiatives in this field was the use of Mr McClelland Barclay´s range of geometric camouflage designs.
A range of aircraft types were involved in the experiments, BuNo0339 and BuNo0320 were two TBD-1s selected from the USS Saratoga´s Airgroup to participate in the trials. BuNo 0339 was painted according to Barclay´s Design No.8. This used what appears to be Dark Blue, Gray Blue, Light Grey and White.
All the colors were non-refelctive and of a temporary, water-based nature so that the aircraft could easily returned to their appropirate markings after the trials.
It seems that no surface preparation was made, as the starboard side showed extreme wear and flaking of the paints used. All markings and insiginia were painted over. However, the squadron codes (3T) are partially visible on the starboard side through either wear or the thinnes of the paint. All under surfcaces were painted white with thin Dark Blue lines accross the main surfaces.
The trials were conducted several weeks during the summer of 1940. They included air combat and anti-aircraft defence scenarios, with both camouflaged and un-camouflaged aircrafts operating together. However, the experiments were proved to be inconclusive, both the design and colours being criticised.
One positive outcome was the move by the Navy to non-reflective paints which should eliminate reflective flashes and the brightness of some colours used.
Text quoted from "On target special, Wings of the fleet, USN and Marine Corps Aviation 1919-1941" by Peter Freeman and Mike Starmer.
Please check out more about this awesome book on the bottom of this page.
The aircraft from all sides
The tactical code
Pictures from: On target special, Wings of the fleet, USN and Marine Corps Aviation 1919-1941

Here you see the " 3 T " tactical marking to be applyed on both sides of the fuselage. It is barely visible on the photo.

In the following you see the masks attached to the model. Please consider the sequence of the color codes.
First of all paint the entire fuselage in a very bright Grey (Off-White).
The masking set contains so-called "alignment masks" in addition to the actual masks. These masks (18,22 and 23) act as a guide on determine the correct positions for the blue strips on the underside of the wings.
These masks shall be removed once the actual masks are in place. The space left by the alignment masks is where the following color code (dark blue) shall be applied.
The job on the belly of the bird aint that difficult. Please check all the reference pictures in order to make sure that you meet the arrangement of the white areas on the tailplane and the fuselage sides.
Once this is done, proceed around the fuselage. The masking set layout picture and the following pictures are quite telling in regards to the corrcet positions. Ceck out the pictures on the end of the following sequence. There you can see it.
Left picture: The aligment mask in action. Right picture: The aligment masks are removed. We now cover the edges outwards to avoid overspray and we´re good to go. Ouh! Yeah we need a lil bit o´ colour of course...silly me. :-)
I strongly do recommend this book. Loads of inspiring schemes and background information about the USN and USMC between the wars, the so called "golden era". This one is especially for the yellow-wing-lovers amongst us. I love this stuff :-)
It was on great help preserving the historical heritage of this part of aviation history. Within Uschi´s humble capabilities of course.....


Our sincerest thanks to scalemodelingnow.com, namely Geoff Coughlin and David Coward, for sharing these wonderful pictures of the finished bird with us. Check out SMN! Worth it!


